mcpro24fps RAW Converter is a Windows program for RAW clips recorded by the mcpro24fps app in the .mcpro format. It plays a clip with its sound and turns it into a file that editing programs can open: CineForm or H.264 / HEVC video in MOV, or a CinemaDNG sequence.
The installer from mcpro24fps.com can add two more ways to use the same clips without converting them:
- the module for Adobe, which opens .mcpro clips directly in Premiere Pro and Media Encoder;
- the virtual disk, which shows every .mcpro clip as a CinemaDNG folder, so DaVinci Resolve and other programs that read CinemaDNG can use it directly.
Viewing and playback are free. Converting, saving frames, the module and the virtual disk need a mcpro24fps account with RAW Bundle, the same purchase as in the phone app. See Account and RAW Bundle.
Which way to choose
- You need an ordinary video file for editing, for a client or for uploading: convert the clip. The converter can also make HDR video (HLG or HDR10) and, with an NVIDIA graphics card, a file with no loss at all.
- You edit in Premiere Pro or export with Media Encoder: install the module and put the clip straight on the timeline.
- You edit in DaVinci Resolve, free or Studio: use the virtual disk. Resolve sees CinemaDNG, so its RAW panel works.
- You want a CinemaDNG copy to archive or to hand over: convert to CinemaDNG sequence.
How this guide is organised
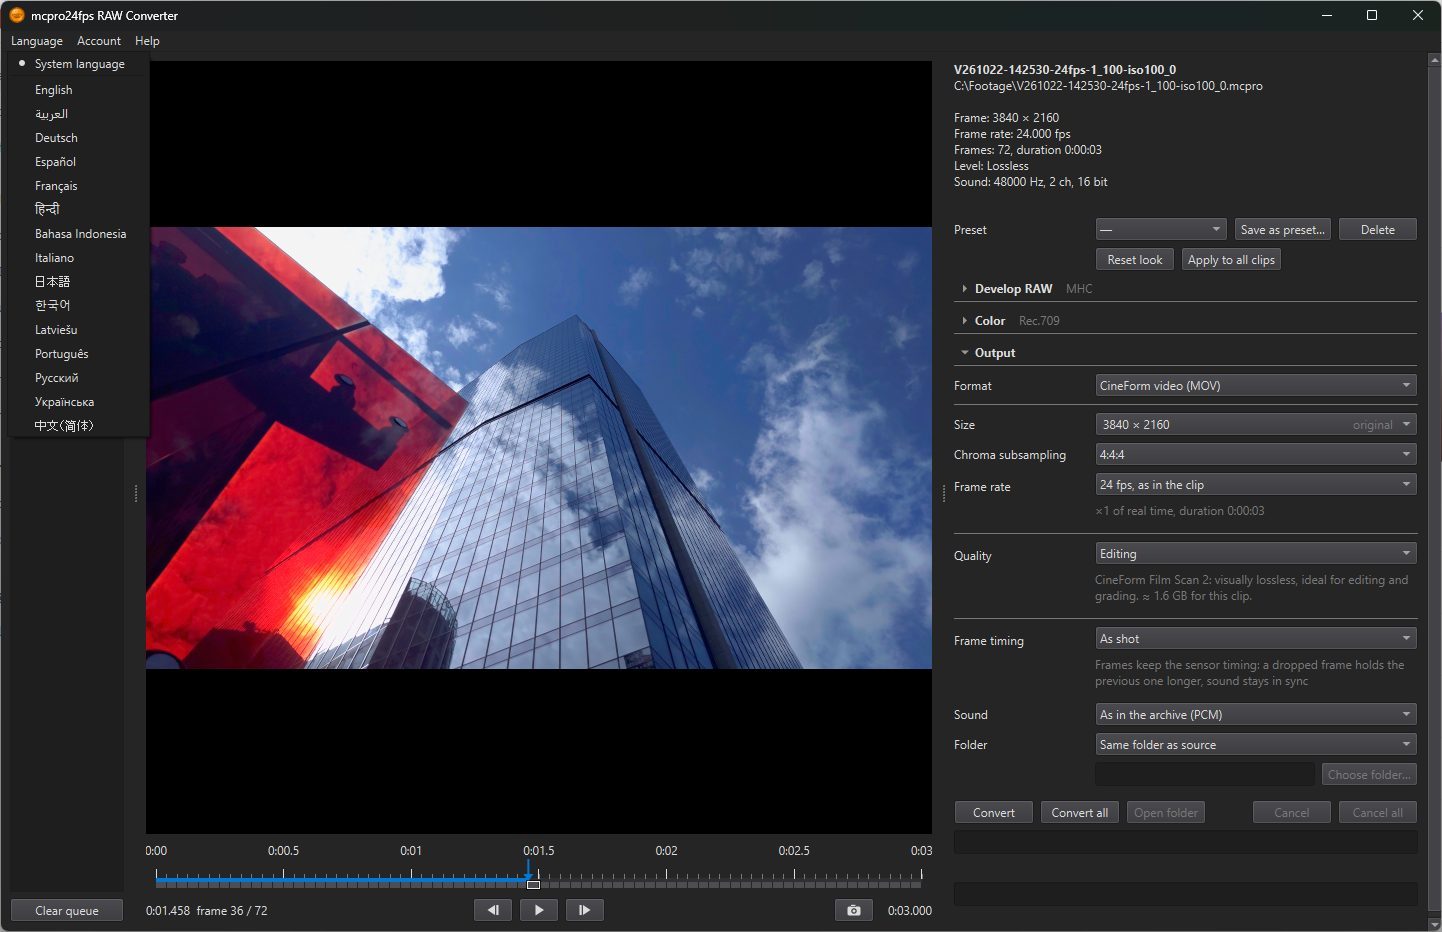
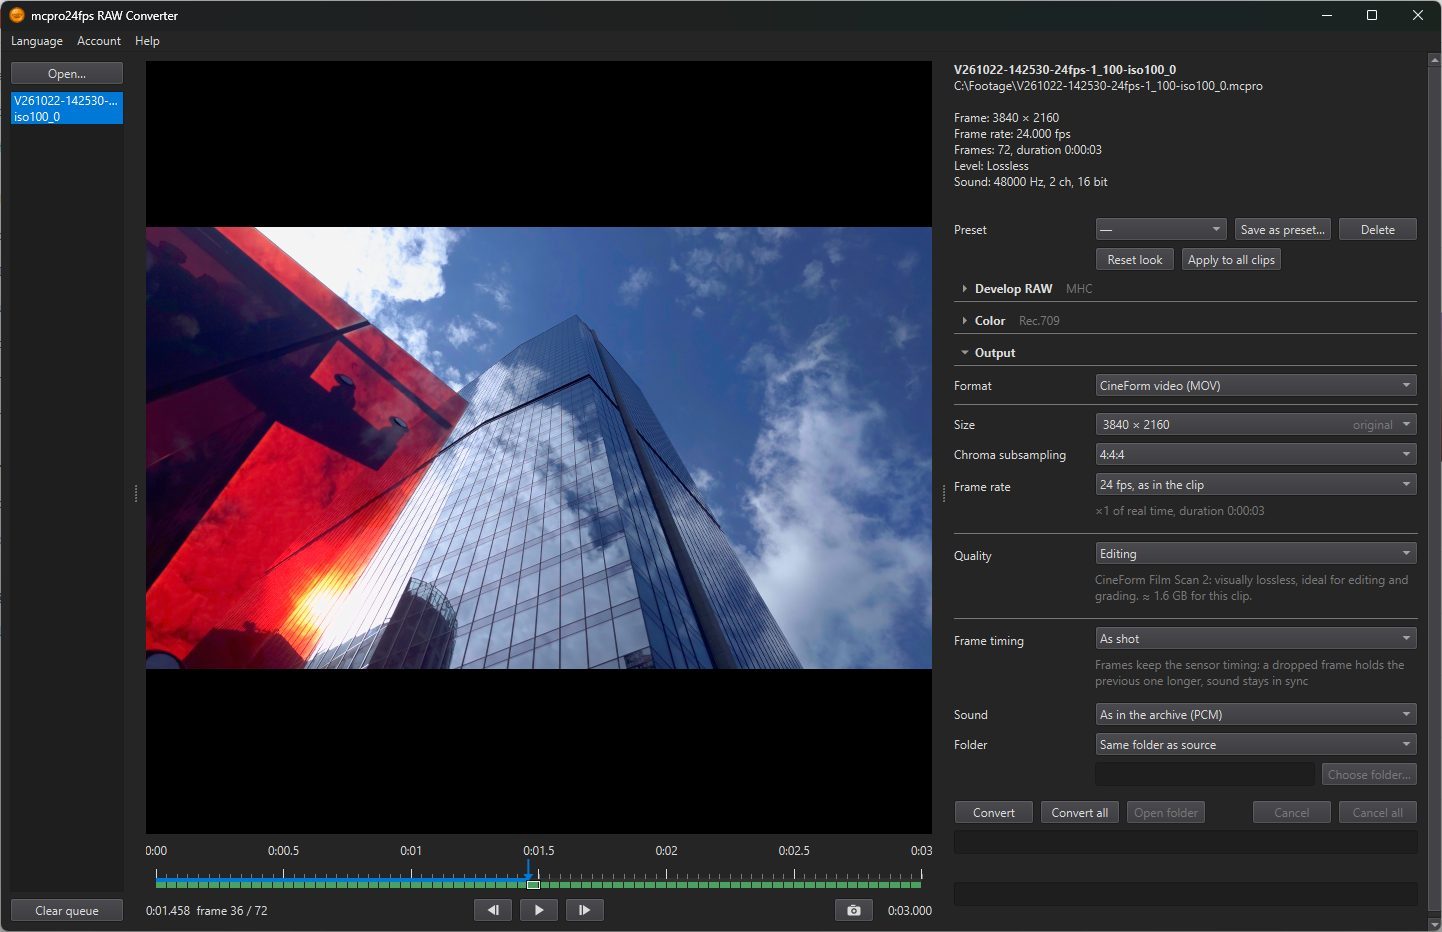
The converter window has the list of clips on the left and the preview on the right. Under the preview are three groups of settings, in the order the picture is processed. The guide follows the window:
- Clips and preview: opening clips, the list, playback, the frame status bar;
- Develop RAW: the look of a clip and its presets, white balance, debayer, lens corrections;
- Color: exposure, SDR or HDR, the output curve, your LUT;
- Output: format, frame size and rate, codec and quality, sound, folder;
- Converting: starting, the queue, existing files, errors.
Then come the chapters on the module for Adobe and the virtual disk, and step-by-step articles at the end.
The guide names every setting exactly as the window does, in the language of the page. To change the language of the window, use the Language menu: it switches at once, without a restart.