
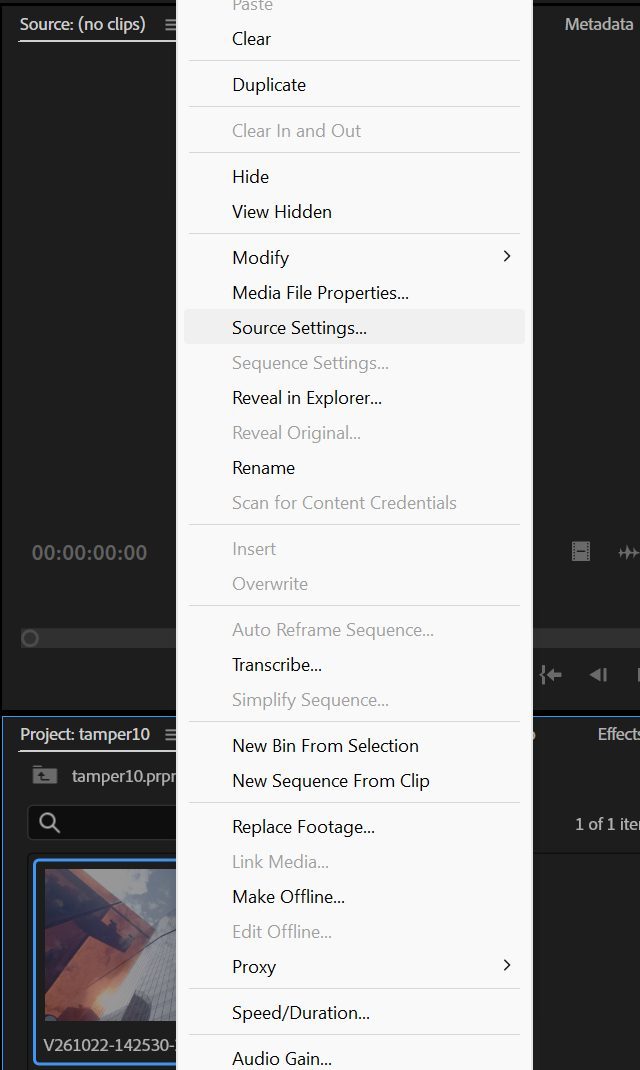
To change how a clip looks in Premiere Pro, right-click it in the project or on the timeline and choose Source Settings. It is in the middle of a long menu, under Media File Properties.
The window opens with the clip's name in its title. On the right is a preview with a slider to move through the clip. The preview updates with every change.
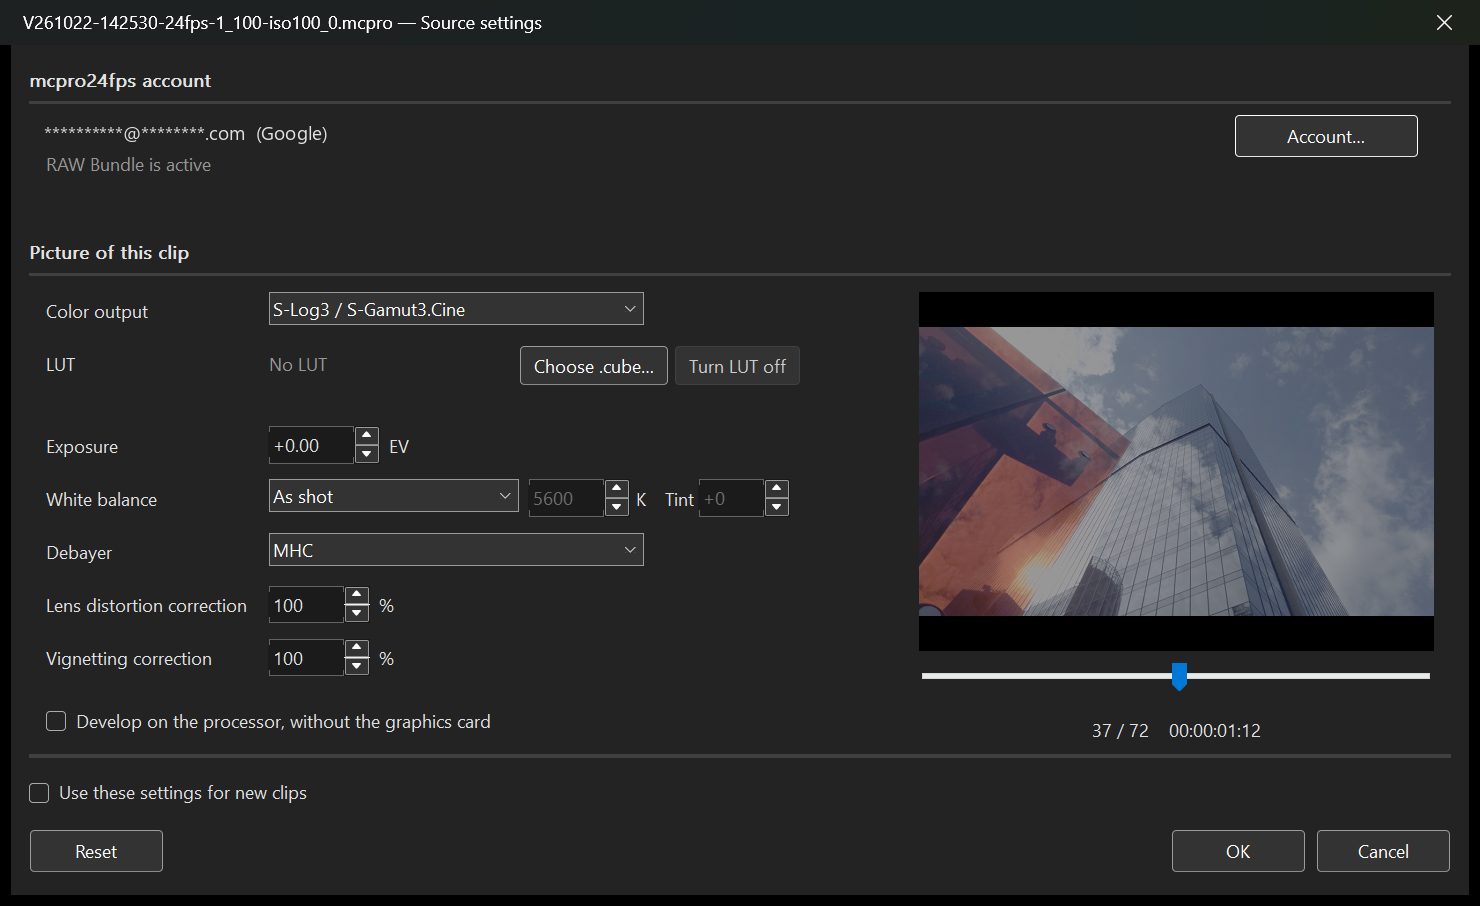
At the top you see the mcpro24fps account: who is signed in and whether RAW Bundle is active. The button there opens the converter's account window.
1Color output
The curve of the picture Premiere gets:
- S-Log3 / S-Gamut3.Cine: default. Premiere knows this curve and converts it with its own color management.
- DaVinci Intermediate: for your own LUT or grading. Premiere treats the picture as Rec.709, so apply a conversion LUT yourself.
- Rec.709: a finished picture, ready to watch.
- Linear (BT.2020, scene): light values as 32-bit float numbers, so highlights brighter than white are kept. Premiere converts it with its color management.
2LUT
A .cube file applied on top of the picture, with Choose .cube… and Turn LUT off. With a LUT the output is Rec.709, and the Color output list is unavailable.
3Exposure, white balance, debayer, lens corrections
The same as in the converter (see Develop RAW and Color):
- Exposure: −4 to +4 EV. The arrows change it by 0.1, with Shift by 0.01, with Ctrl by 0.5.
- White balance: As shot, or Temperature and tint (2000 to 15000 K, tint −150 to +150).
- Debayer: MHC (default), AHD, Bilinear, AHD + color noise reduction.
- Lens distortion correction and Vignetting correction: 0 to 100 %, default 100 %.
4The other options
- Develop on the processor, without the graphics card: turn this on if the picture is broken or Premiere crashes because of the graphics driver. Developing on the processor is slower.
- Use these settings for new clips: clips you import later get these settings. A clip whose window has never been opened always uses the current defaults, including changes you make later.
- Reset: back to the default settings, without a LUT.
OK applies the settings, and Premiere reads the clip again.