
1White balance
Opens the white balance menu, described below. Tap again to close it.
2White balance lock
Appears with automatic white balance. Tap to lock the balance: .
Auto white balance once
The "A" button appears instead of the lock in Manual mode. Hold it: while it is pressed the camera uses automatic white balance. When you release it, the result becomes the manual setting.
- manual white balance without a saved preset;
- a saved preset is selected; double-tap to go back to plain manual mode.
3Curves, colour, image
Opens the image processing menu: curve, colour, image and noise reduction. The curve sliders control the log strength (mLog), gamma and contrast.
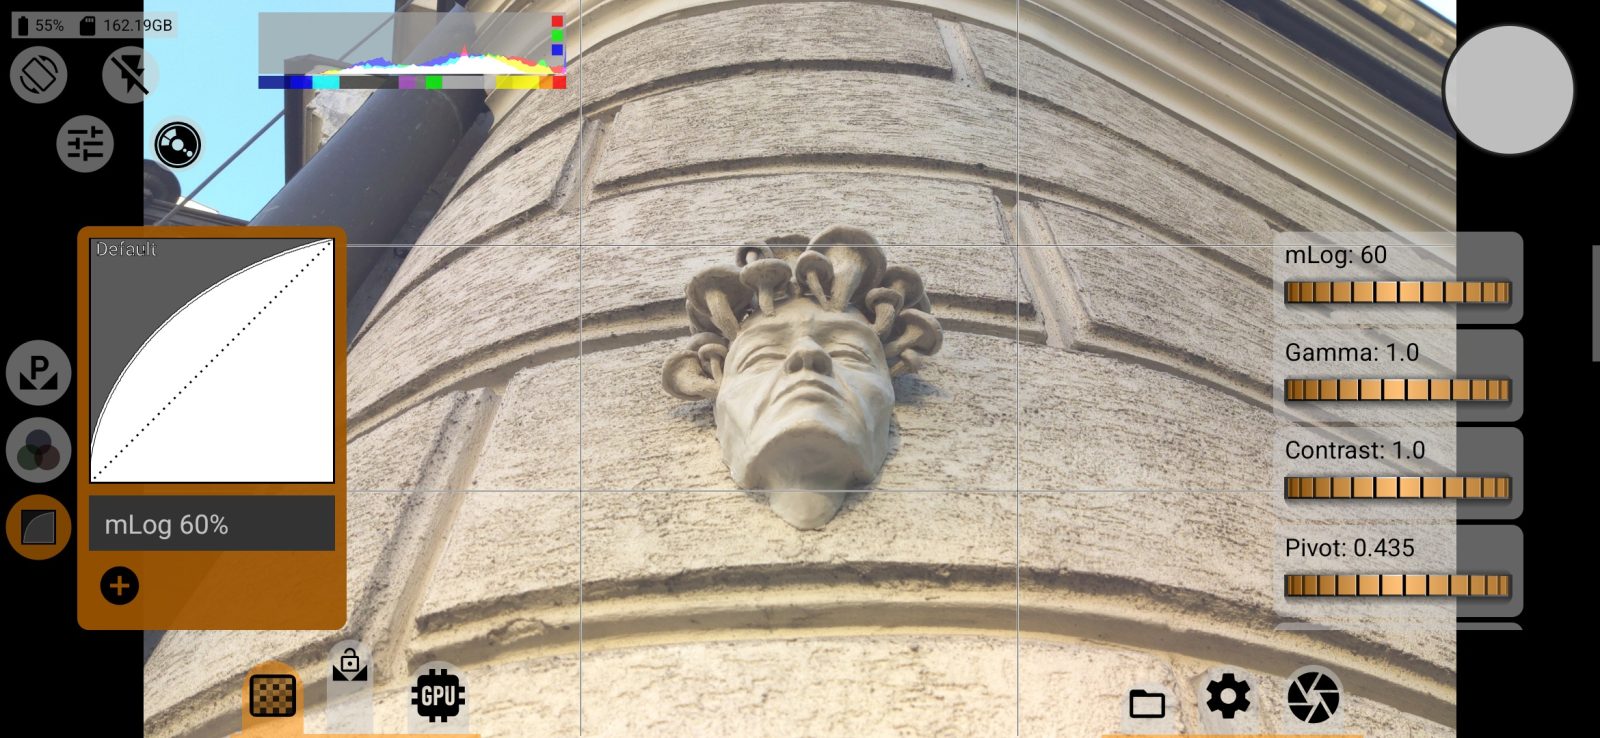
In the JPEG, HEIC and AVIF formats with RAW development, the curve settings are applied to the photo itself. For the camera JPEG, the camera applies the curve.
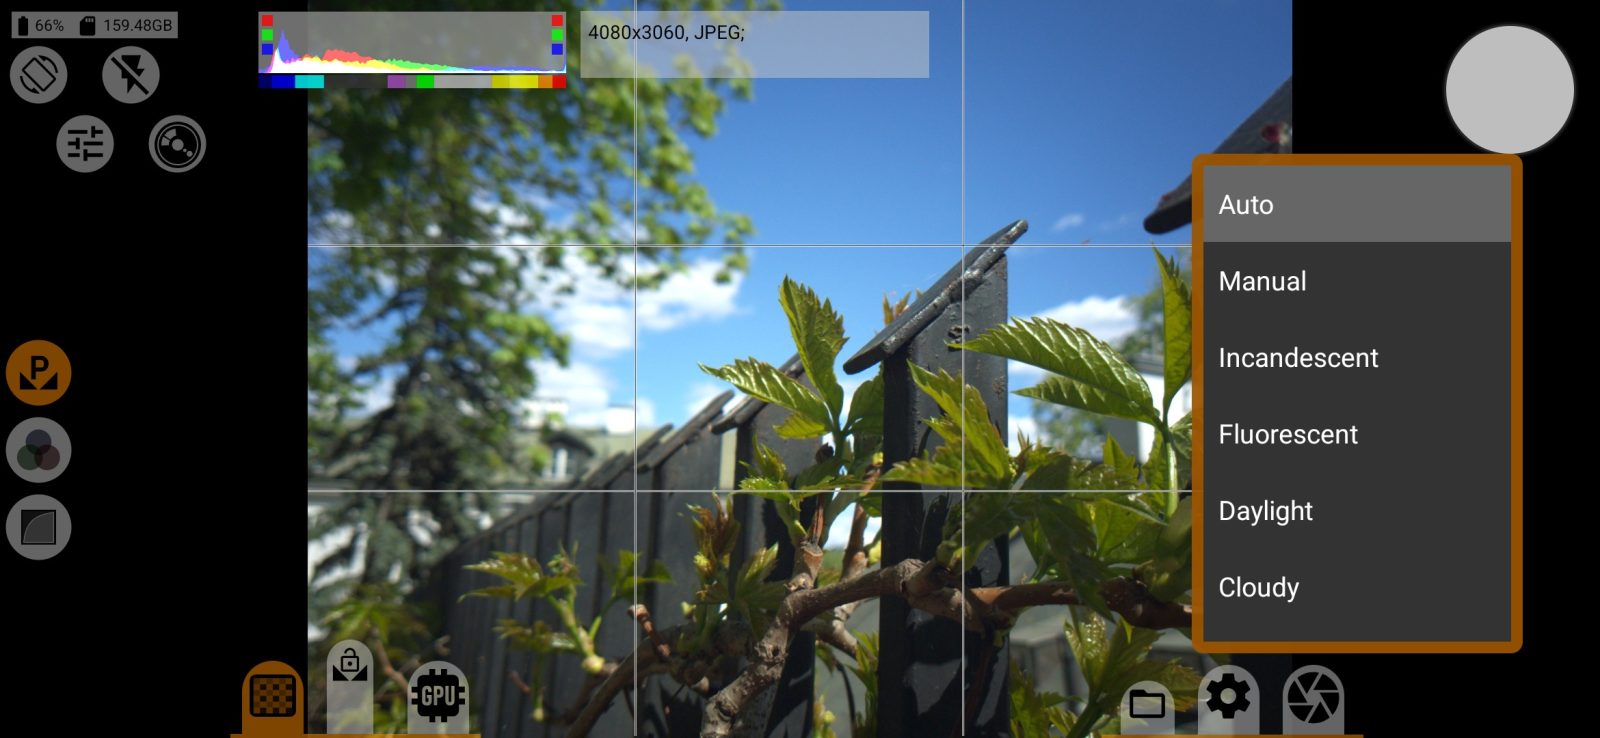
White balance menu
The white balance button opens a menu with tabs on the left. The list shows the modes the camera supports: auto, manual and ready-made modes such as incandescent and daylight.
Manual white balance
The tab works only in Manual mode. In other modes it shows the message “This tab only works in manual WB mode” and a Turn on button that switches to manual mode.
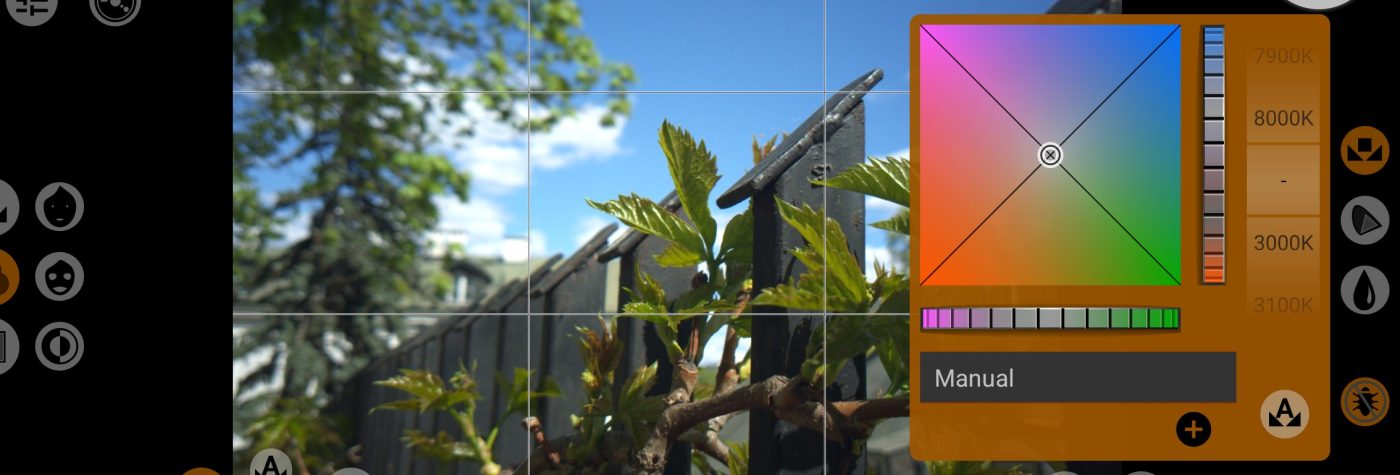
The buttons in the right column switch between panels: white balance, colour gamut and colour matrix. The last two are not available in the DNG format and on cameras without manual colour processing. The buttons in the left column turn on colour checks over the viewfinder.
4Balance plate
The square plate moves both wheels at once: horizontally for colour temperature, vertically for tint. The marker shows the current balance.
5Temperature wheel
The vertical wheel shifts the balance between blue and yellow. Double-tap it to reset.
6Tint wheel
The horizontal wheel shifts the balance between green and magenta. Double-tap it to reset.
7Kelvin wheel
Sets the temperature from 3000 K to 8000 K and keeps the tint. "-" means no Kelvin value is set.
8Auto white balance once
Works the same way as the "A" button on the main screen: while it is pressed the camera sets the balance on its own, and when you release it the result becomes the manual setting.
910Presets
The list shows the current preset. saves the current balance as a preset with a name of up to 30 characters. For a saved preset, returns to its values and deletes it.
11White balance panel
Shows the white balance panel described above.
12Colour gamut
Shows the colour gamut panel: the target colour space of the camera's colour matrix. Options: sRGB/Rec.709, P3-D65, P3-DCI, Rec.2020, A Wide Gamut, C Cinema Gamut, P V-Gamut, R Wide Gamut, S-Gamut/-3, S-Gamut3.Cine, D-Gamut, Davinci Wide Gamut, ACES AP1, ACES AP0, XYZ.
13Colour matrix
Shows the colour matrix panel: saturation, gain and hue, each block with a common slider and separate R, G and B sliders. Double-tap a slider to reset it.
14Highlight fix
The bug button removes artifacts in highlights with steep curves in manual white balance: it slightly lowers the gain and recalculates the curve.
15Skin tone check, wide
Paints the areas of the frame that have a skin tone yellow. The selection is wide and also includes nearby tones.
16Skin tone check
The same with a narrow selection: only tones close to skin in colour and brightness.
17Neutral tone check
Paints the neutral, unsaturated areas of the frame yellow. This helps you set the balance by a grey card or a white wall: when the balance is right, they turn yellow.
The three checks are visible only on the screen while this tab is open, and they do not affect the photo.